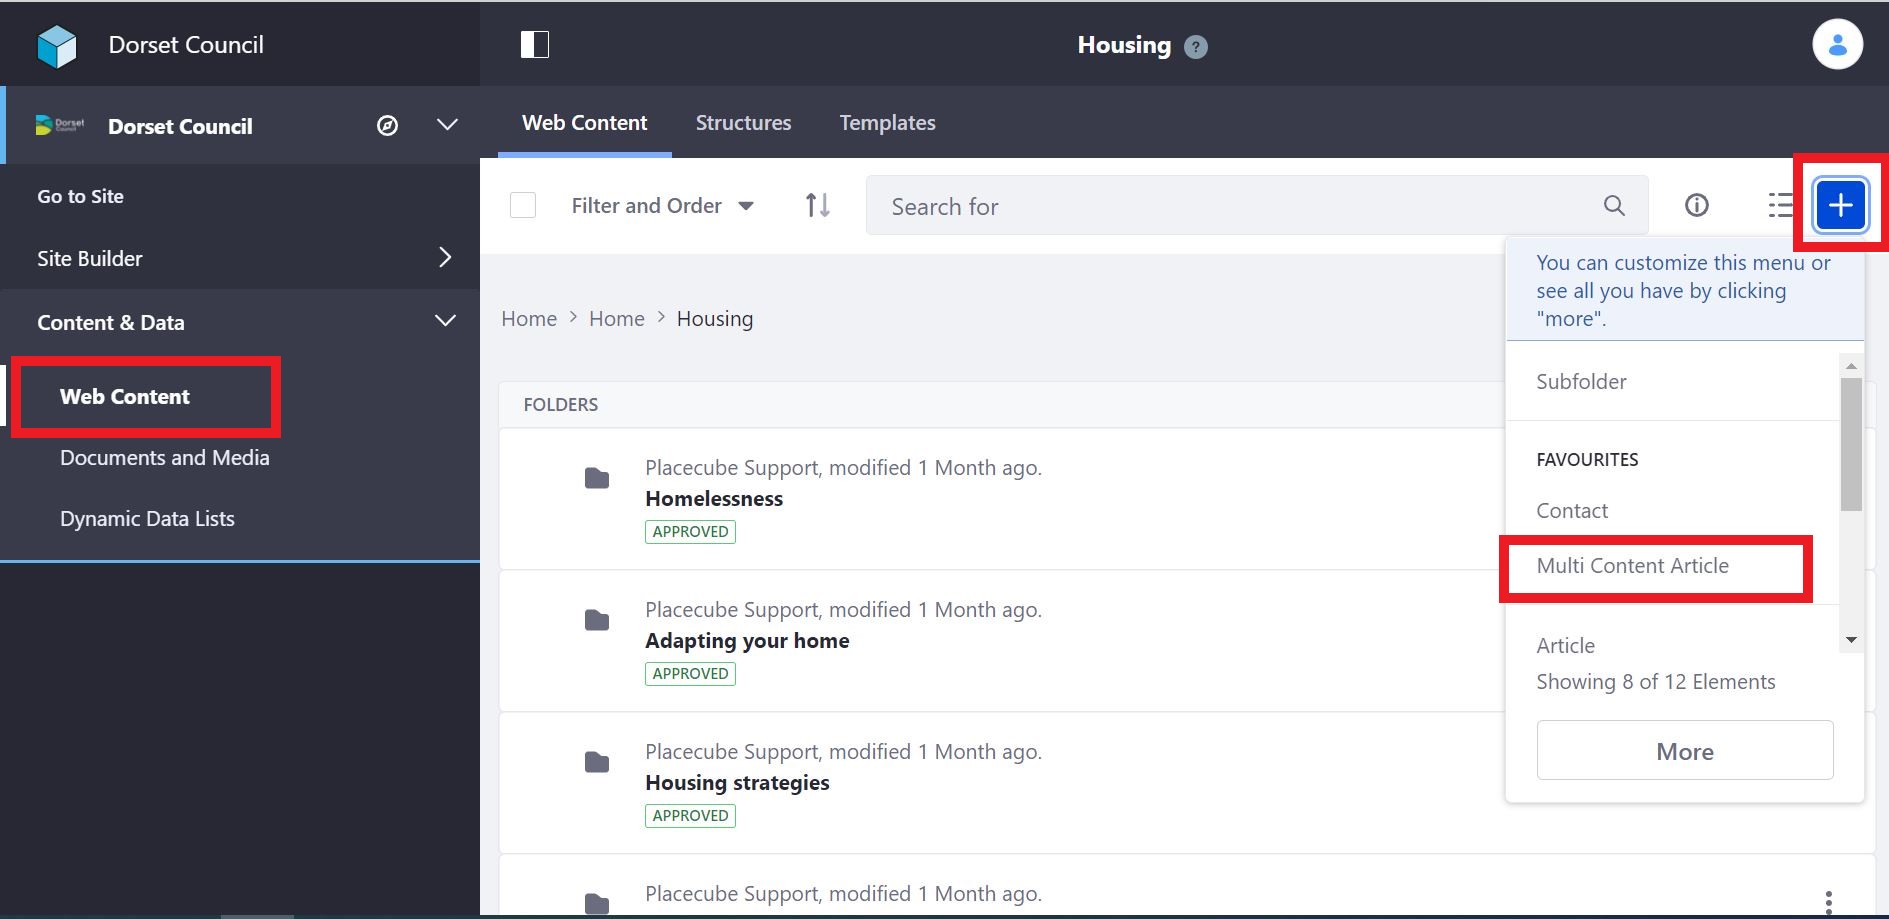
Go to 'Content & Data' on the left hand navigation and click to expand. You will see 'Web Content'. Once selected you will see a list of folders, click on 'Home' to access all the site content. You can either drill down to the folder you wish to add an article to (for example Housing), or click the blue + icon in the top corner to start from Home.
You will then get a list of templates. Select 'Multi Content Article' to create a web page.
You've created your article. Now you can add some content.
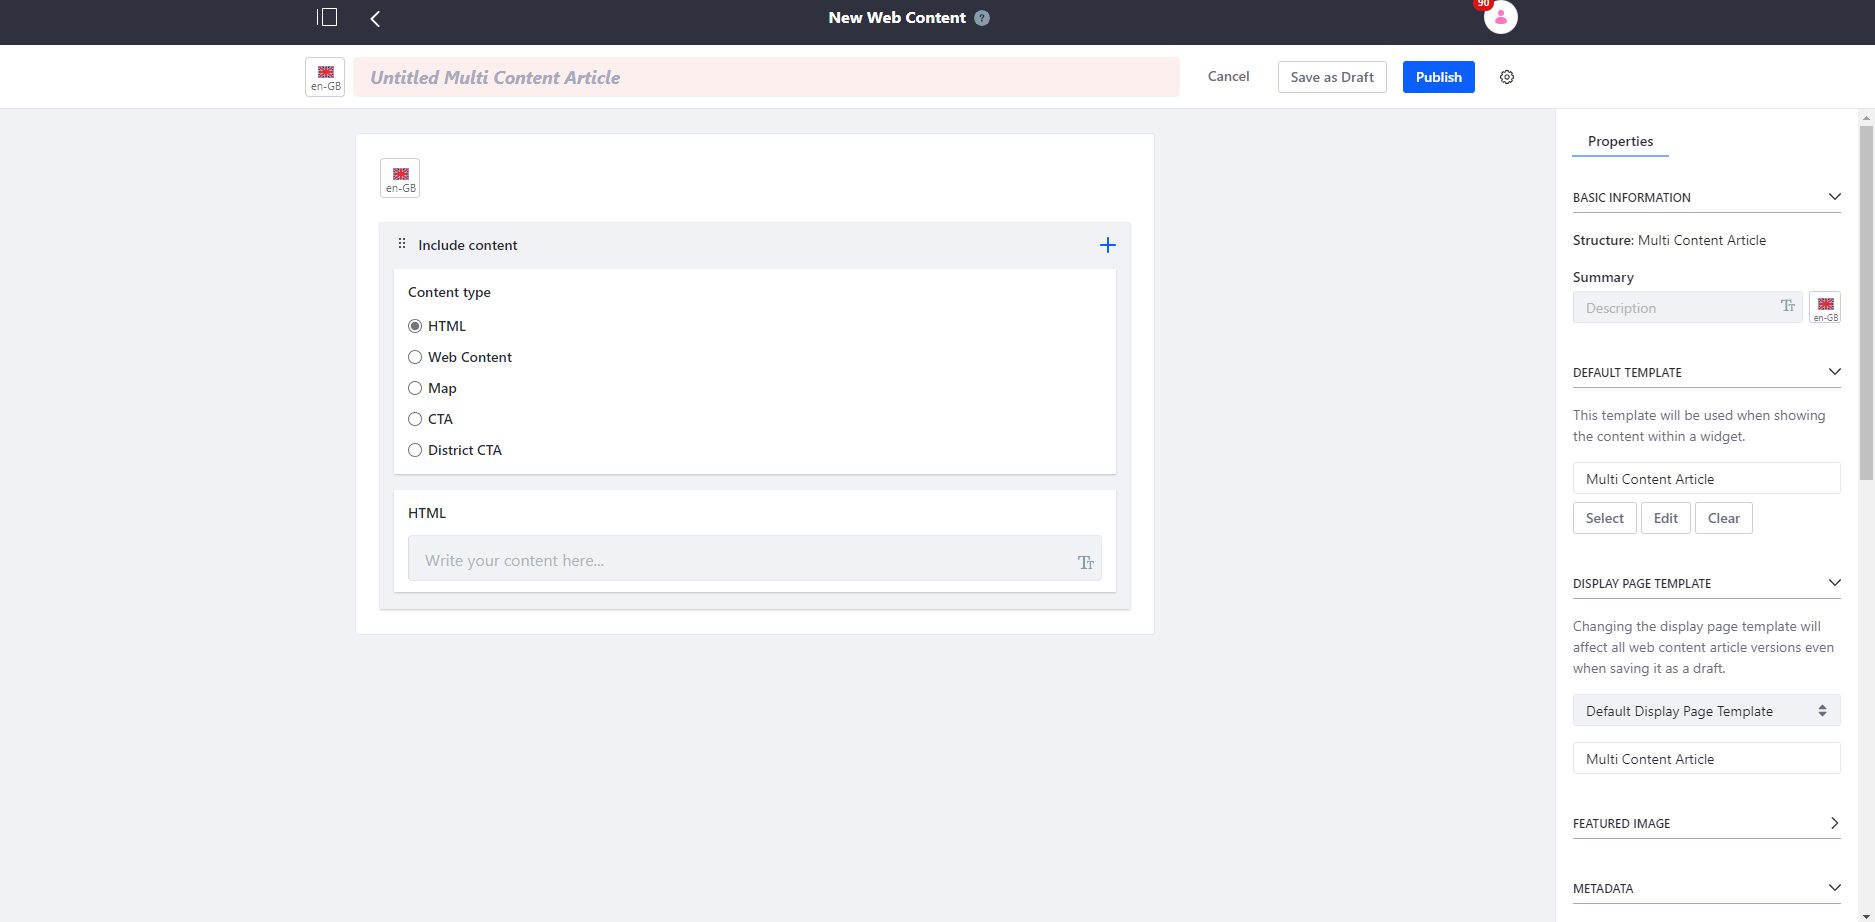
Title
Add your article title at the top of the page. This will then be displayed on the page as the H1. Your title should include keywords and council name where applicable.
Add content
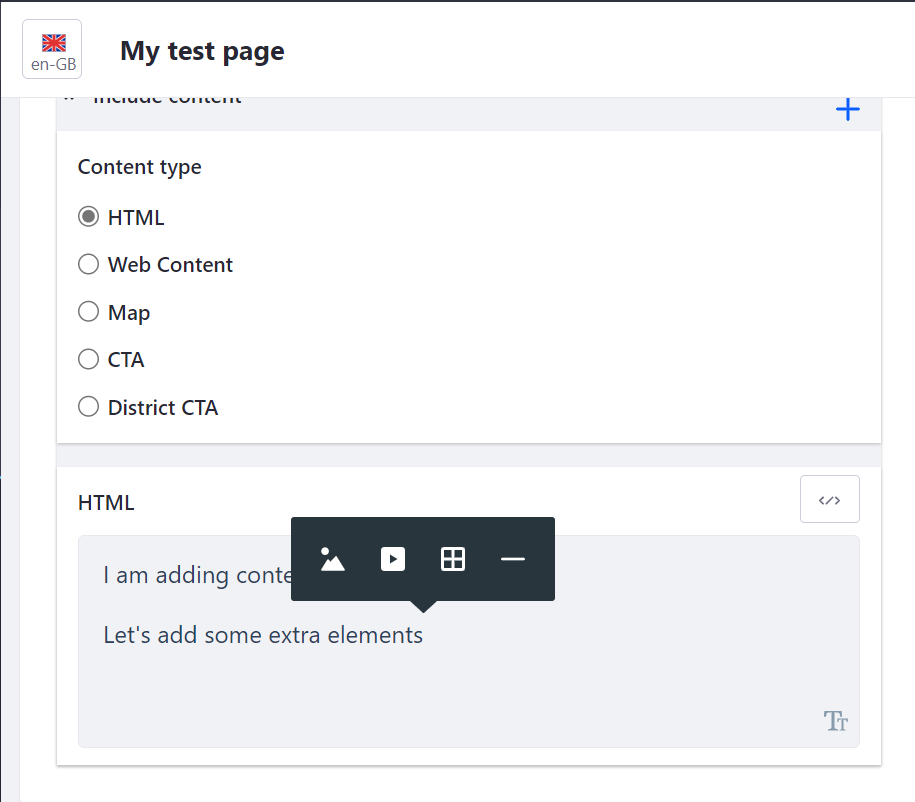
Start typing in the 'HTML' block selected to add content. There are 2 menu's to edit the content - the first is visible as a + icon in grey to the left. Click it to see options for adding images, videos, a table and a horizontal line. See how to add an image, table or video.
The second menu to edit content is known as the tool bar. Double click on the article content and it will appear:
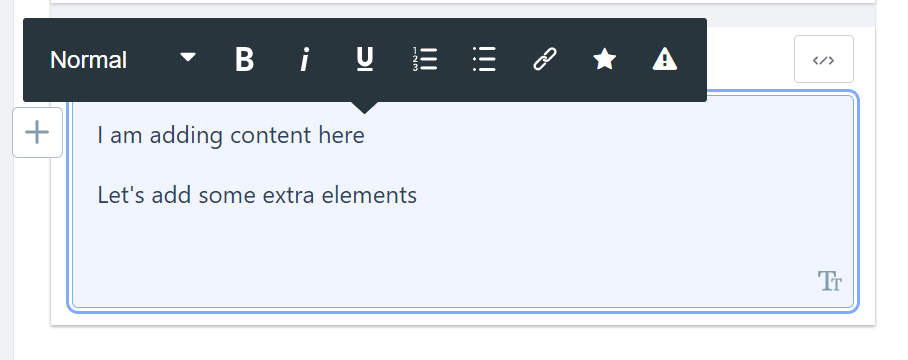
The tool bar
Headings
Here you can structure the article with headings by selecting the text and the correct heading. You can also add bullet points, numbered lists and links. We ask that you do not use Bold, Italics or the Underline tools. Use of these will be rejected in approvals as they do not meet our content guidelines, as they can confuse users and make text harder to read.
Select the drop down next to 'Normal' to access the headings. Editors are asked to stick to 'Normal' and the heading structure we've always followed:
- H1 at the top of the article as the main title
- H2 for the secondary heading
- H3 for anything of lesser importance beneath and so on
You may find you need to select any text you copy and paste in and select 'Normal' to format the text correctly and strip out any code.
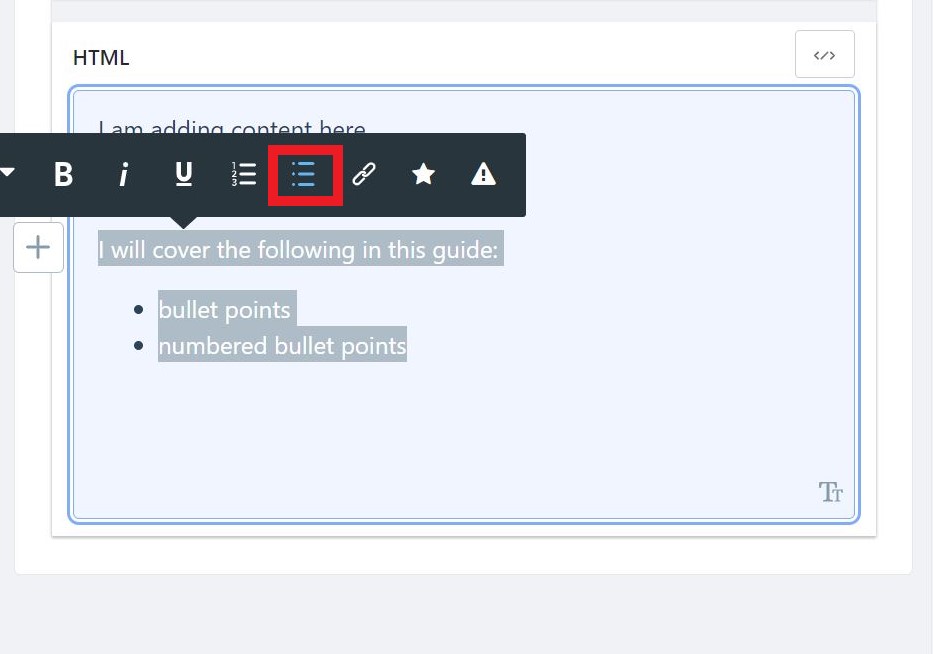
Bullet points
Select the text you wish to present as bullet points and select the bullet list to order them. Remember bullet points should always have a lead-in sentence before them.
When copying and pasting text in, you may find bullet points need re-doing. Select the bullet points, select the bullet list icon to remove, then select again and add the bullet points back to ensure they follow the correct format. Use plain bullet points unless you need an established numerical order for people to follow (a guide) in which case use the numbered bullets.
Links to web pages and documents
The tool bar is where you will add any links to internal or external web pages or documents. Select the link icon
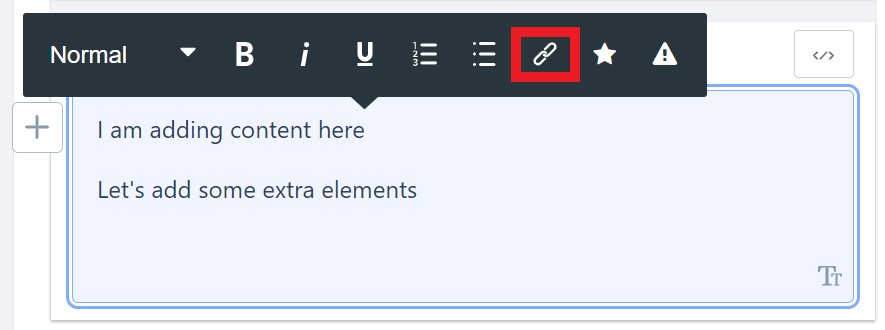
You then have the option to paste in a link to a page or article, or access a document with the folder icon.
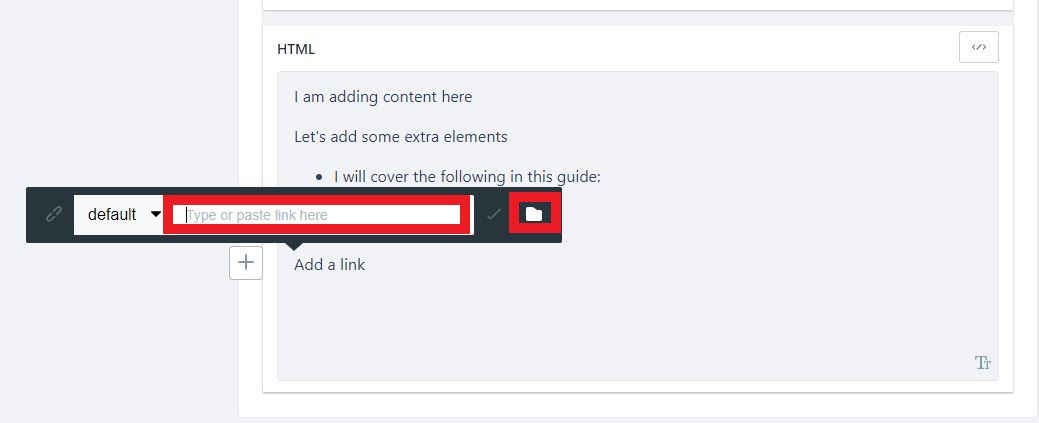
Internal links
For an internal link within our own website, open the page or article you wish to link to in a separate window and take the end of the URL starting at the /. For example, if you wish to link to https://www.dorsetcouncil.gov.uk/bins-recycling-and-litter/contact-dorset-council-waste-services you need only include the end of the URL /bins-recycling-and-litter/contact-dorset-council-waste-services. You can also take the friendly URL of any article which is in the right hand navigation whilst editing. See friendly URL's for more information.
External links
If linking to an external page, please copy the entire web address from a new window. There is no longer a link library so all links will need to be changed direct on the web page.
Document links
Click the folder icon to access the document library. Select documents, and you will see folders for each service. You can drill down until you reach the correct folder and either select a document or upload a new one from your computer. You can also search for a document if you know the file name. Putting your key terms/document name into quotation marks will narrow the search.
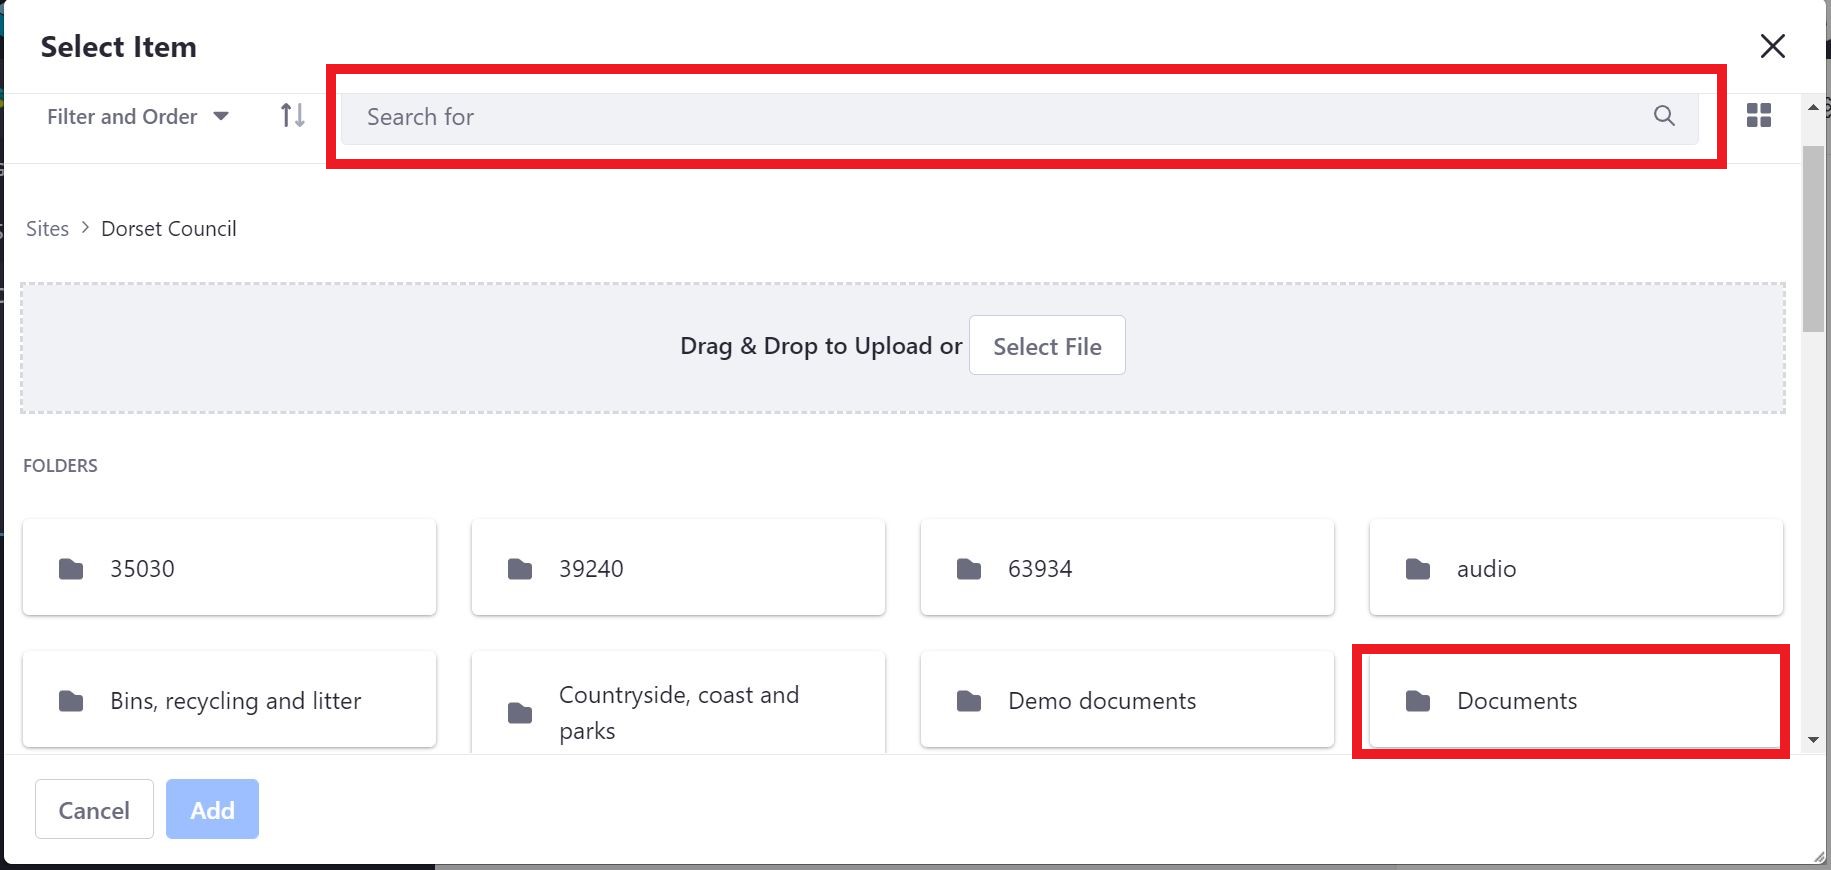
Once you have selected a file or uploaded a new document into the correct folder the option to 'add' will show as blue.
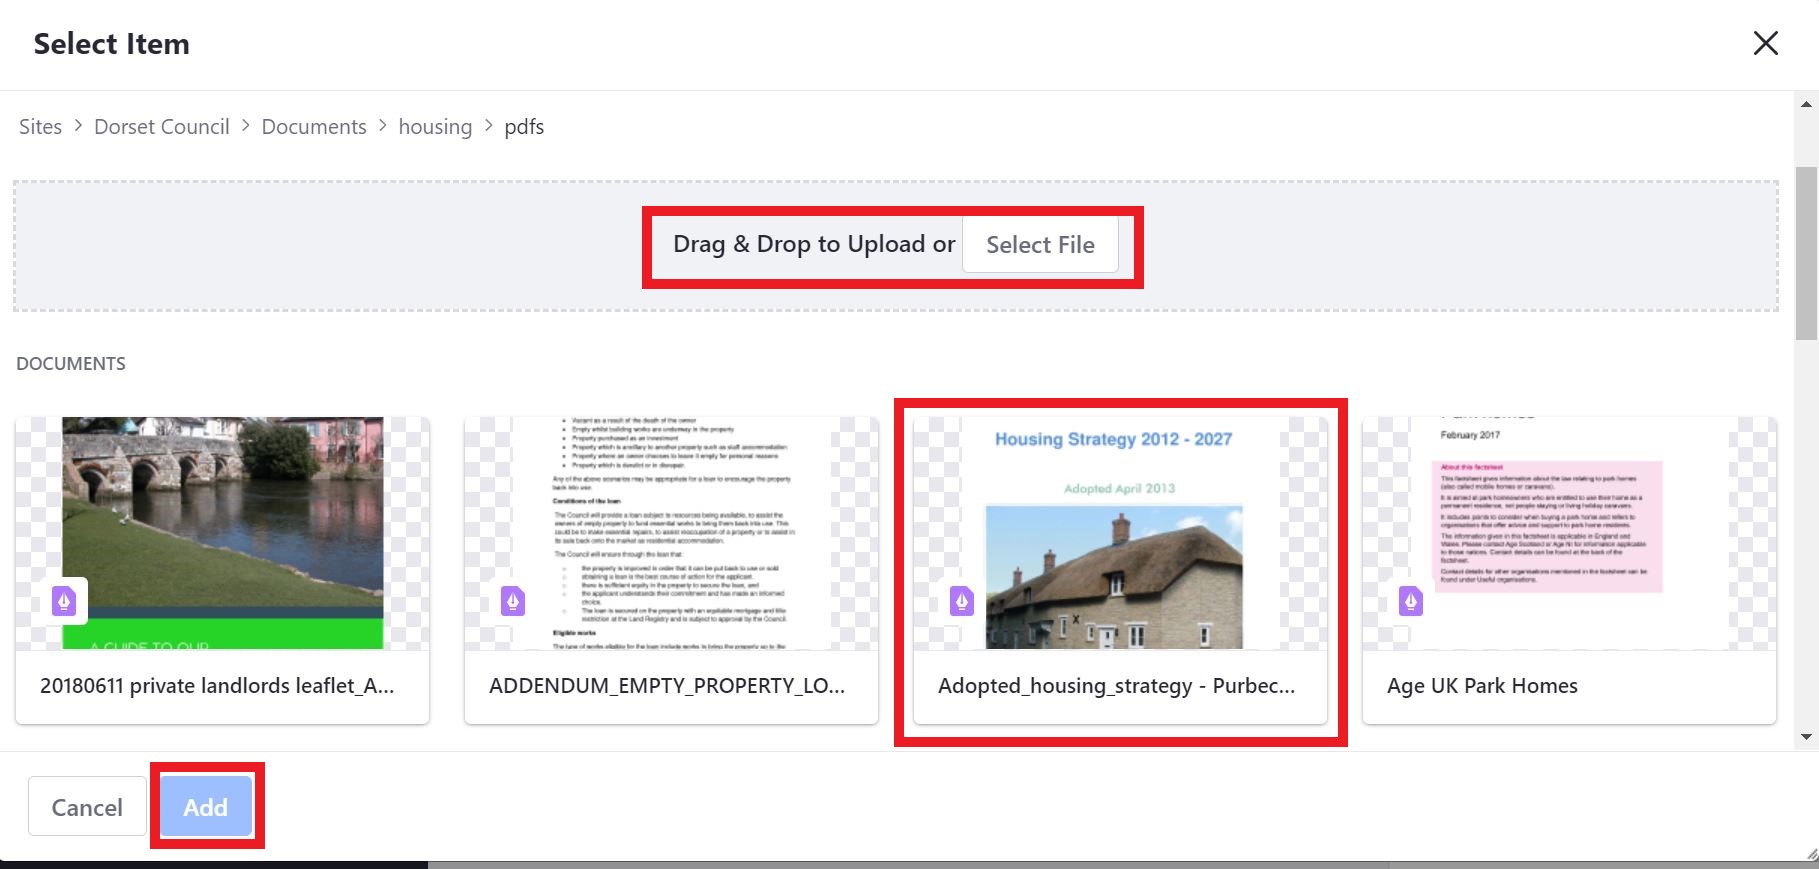
Key features of a webpage
We’ll take a look at the remaining key features in an article:
Instructions for:
Save as draft
Click Save as Draft to save your work and before you submit an article for approval.
Preview
Preview will open your article in a new window and show you what it will look like on the website. You can only preview the article updates once you 'Save as Draft'. So select 'Save as Draft' then on the right hand panel, go to 'Display Page Template' and click on the eye symbol. You will then see your article edits. Cose the window to continue editing, or Publish.
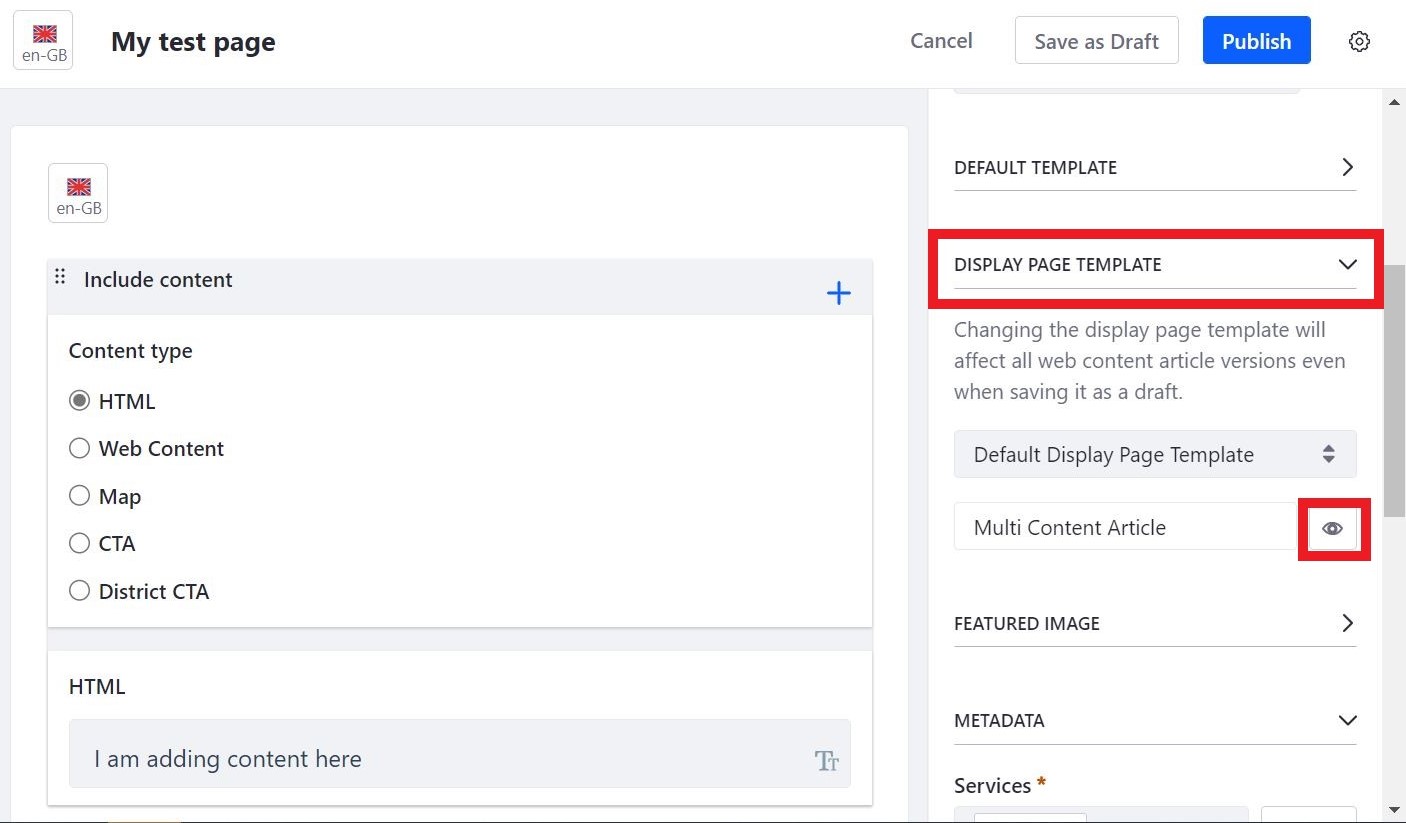
Approvals and workflow
If you’re not ready to submit an article to be published (and go live if approved), You can 'Save as Draft'. When you are ready to, you can start the workflow by submitting your article for approval.
Metadata and summary
You will be prompted to complete a Summary description on every article. This is located on the right hand panel. Please be mindful that the description may appear in Google, so use key words to improve your search rankings.
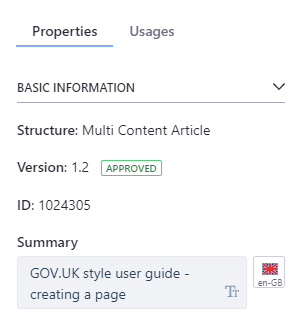
You also need to add metadata. This tags your article with the service it falls under. This should be the folder you wish for the article to appear on.
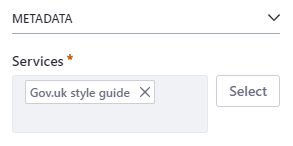
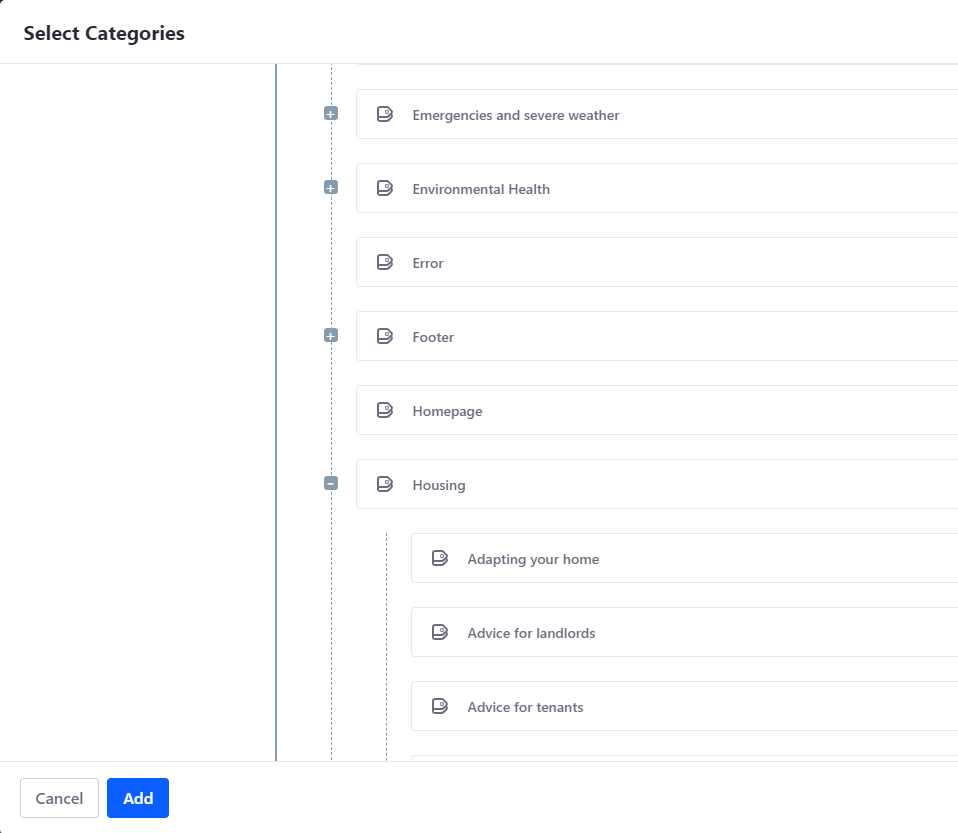
On a new article, the metadata will be blank. Go to 'Select' and find the correct category for your article, for example, in this case I've gone to 'Housing'. Select and it will turn blue, then select 'Add'.
Friendly URL
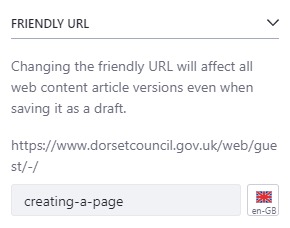
On the right hand panel, scroll down until you see 'Friendly URL'. You can only have one friendly URL per article. It should be entered plainly with no / before it, and broken up by hyphens (-) if it is more than one word. Please consult us before creating a friendly URL. If you need an additional friendly URL for any reason, please contact the content designers.
Scheduling
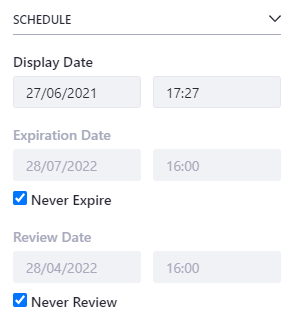
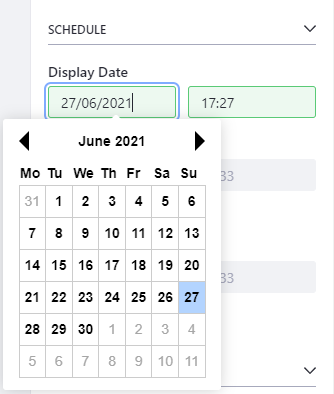
You can set a schedule for your changes to go live at a specific time. Ensure you 'Save as Draft' and the article is finished before you do this. Scroll down the right hand panel until you find 'Schedule'. Select the display date as the date you wish for it to go live, and edit the time. Leave it set to 'Never Expire'. If you would also like to review the content for any reason at a set time, you can uncheck 'Never Review' and input a Review Date. You will then be emailed when it's time to review the content.
Select the date:
Anchors
Anchors are useful tools for taking the customer to content further down the article. You can use them to link to a contact at the bottom of the article or to key parts of the text.
To add an anchor you will need to edit in the HTML. If you're not happy doing this, we can add them for you but if you wish to add one:
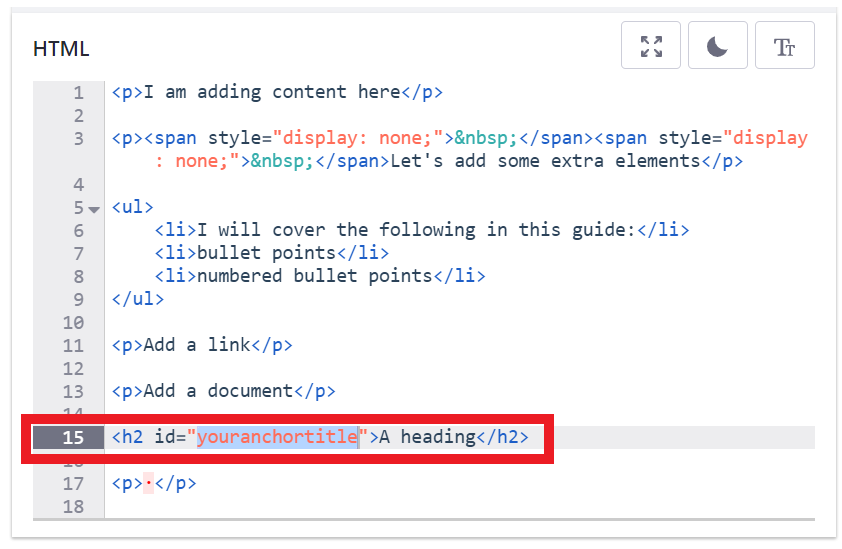
Go to HTML in top corner of the content block, find the part of the text you wish to anchor to, select a heading so the customer lands in a logical place. You then need to add the following code: id="youranchortitle" into the heading just after the h2 and before the closing bracket >, once added it will look like this: <h2 id="youranchortitle">The title here</h2>
Your anchor title will be something meaningful, like 'contact' or the name of the heading you're going to link to/a service.
Here's a step by step in screenshots:
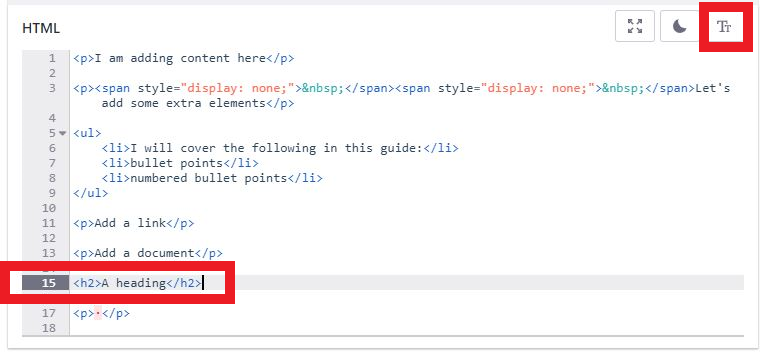
Access the HTML, by clicking the icon for code which is </>
Here is how this article will look in HTML, with the heading you want to anchor link to selected
Here is the anchor code added to the title
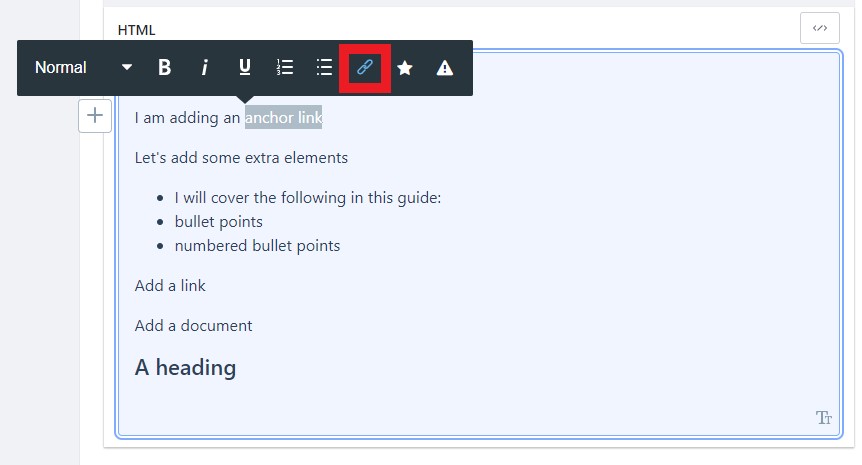
Now that the id title code is added, add your link to the anchor. Find the text you want to link, and add a link as you would usually.
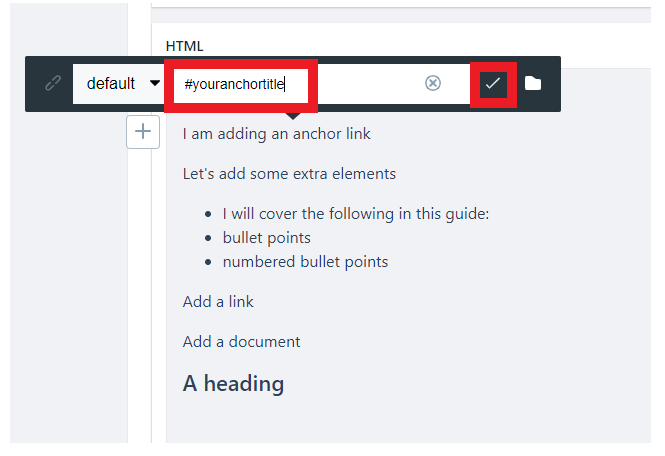
Add a link to the anchor as a #link. You must use the same title as you pasted into the code (so if it was a contact, you'd have added id="contact" and the link would be #contact). Here's how it looks. Select the tick to save it.
6. Here's how the code looks with both the link and the anchor added
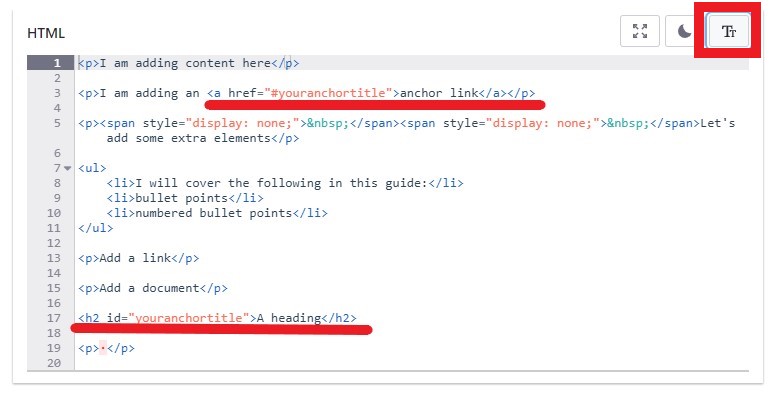
Select the Tt icon in the top right to go back to normal editing and out of the HTML and you'll see a link to your anchor. Preview the article and see how it works. It will link down to your heading.
Tables
To create a table, click where you’d like it to appear in the article content and select the grey + icon to access the table editor:

Then select the icon that looks like a square table.
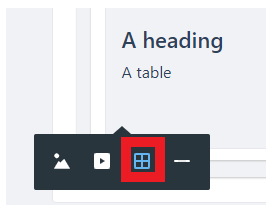
Set the rows and columns you need and select the tick icon to open.
Start entering the data into your table but be sure to set a table header. Whenever you click into the table the menu will appear. Go to 'Headers' and from 'None' set it to First Row, or First column depending on the content.
You can also insert more rows or remove rows as needed.
And you can insert more columns.
The bin icon is to delete the table.
You can copy and paste into each cell as needed. When you preview your article, the table will appear in the correct styling, like this:
Related documents
You can add documents and links to the right hand side of the article - this is useful for supplementary information. Key documents and links should be mentioned in the main article content.
On the right hand panel, scroll down to 'Related Assets', click 'Select' and 'Multi-Content Article' if linking to another article.

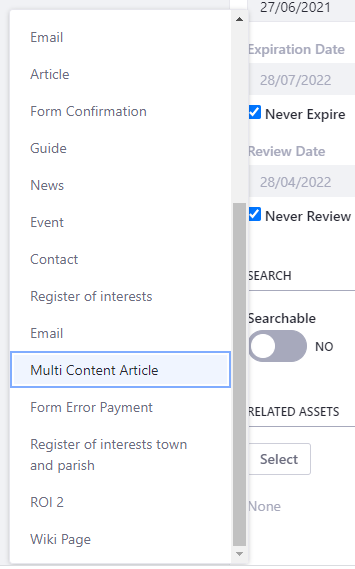
You can then select the article by searching for its title. Searching in quotation marks will get more accurate results. Select the check box next to the article and select 'Done'. It will then appear on the right hand side of the page.
